


The 60s was truly the greatest decade for automobile design, racing, and car enthusiasts. The decade opened with the Stingray Racer and Ferrari 156 Shark Nose and closed with the Lancia Stratos Zero and Porsche 917.
The decidedly open racing regulations of the era encouraged exploration and risk taking. Brilliant characters like Jim Hall, Jack Brabham, Bruce McLaren, the Granatelli Brothers, Dan Gurney, and so many others had the gumption and wherewithal to build their wildest visions and then drive or trailer them to the track and win.
These luminaries (and others) evolved the black art of aerodynamics into an engineering science through trial and error. Some used aluminum engine blocks as stressed members on mid-engined composite chassis, and others strapped jet turbine engines alongside the cockpit. The great kustomizers like Bill Cushenbery, Dave Puhl, and Gene Winfield thoroughly challenged our imaginations. It was an exciting time to be a car nut.
Like most child car enthusiasts, I spent the school days drawing cars and my “free time” building plastic models. In November of 1965, my parents took us to the 50th Annual Detroit Auto Show—where my mind was blown open by the Mako Shark II and Toronado.
Also on display was the Chevrolet Monza Junior go-kart, which Bill Mitchel had built for his stepson. The kart was an identical scaled down copy of the beautiful Monza SS Show Car from 1963.
A watered down copy of Mitchel’s kart could be won in a raffle at the show, so my family and I filled out dozens of raffle tickets and I spent the years to come waiting for Chevrolet to call and make arrangements for delivery. At that age, I was unable to fabricate my own go kart—let alone a real car—but the dream of doing so was firmly embedded in my psyche.
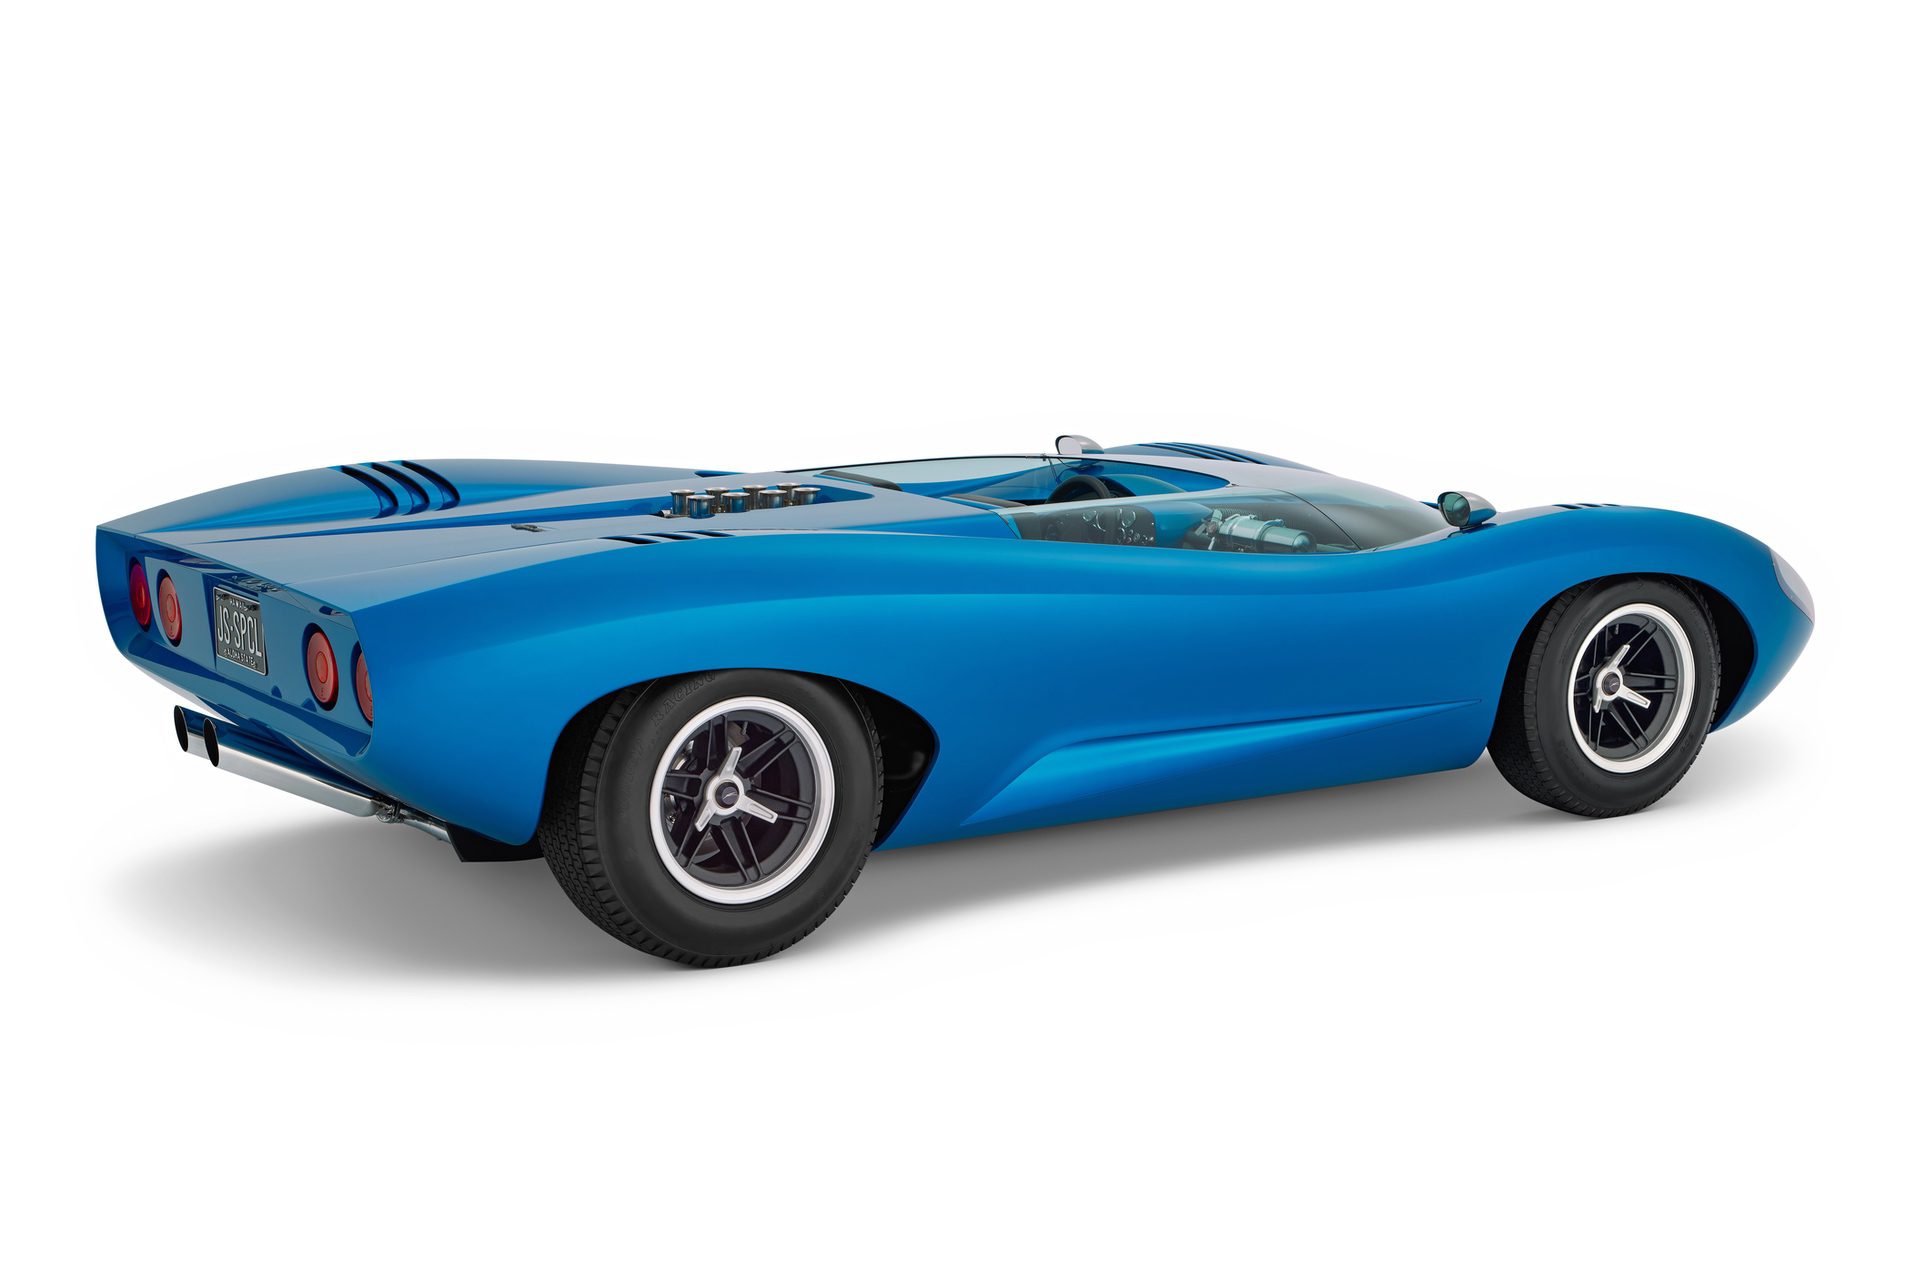
Inspiration Strikes to Design the JS Special Can-Am
Throughout the years, I would draw up designs for various dream cars. While in college, the idea came to me to build a fiberglass body of my own design on the chassis of my ’69 MG Midget.
Some years later, I got serious and visited Caterham Cars in Surrey, England, with the hopes of putting my body on a Super Seven chassis. While working as an Architectural Model Builder in Yanbu, Saudi Arabia, during the early 80’s, I locked down the plan to base my car on an ERA GT 40 chassis.
Things did not work out well with the ERA, but with so many GT40 kit car builders around, I went forward with this idea. I drew the car up on velum in 1:10 scale and built a jelutong speed form, followed by a fiberglass model in that scale.
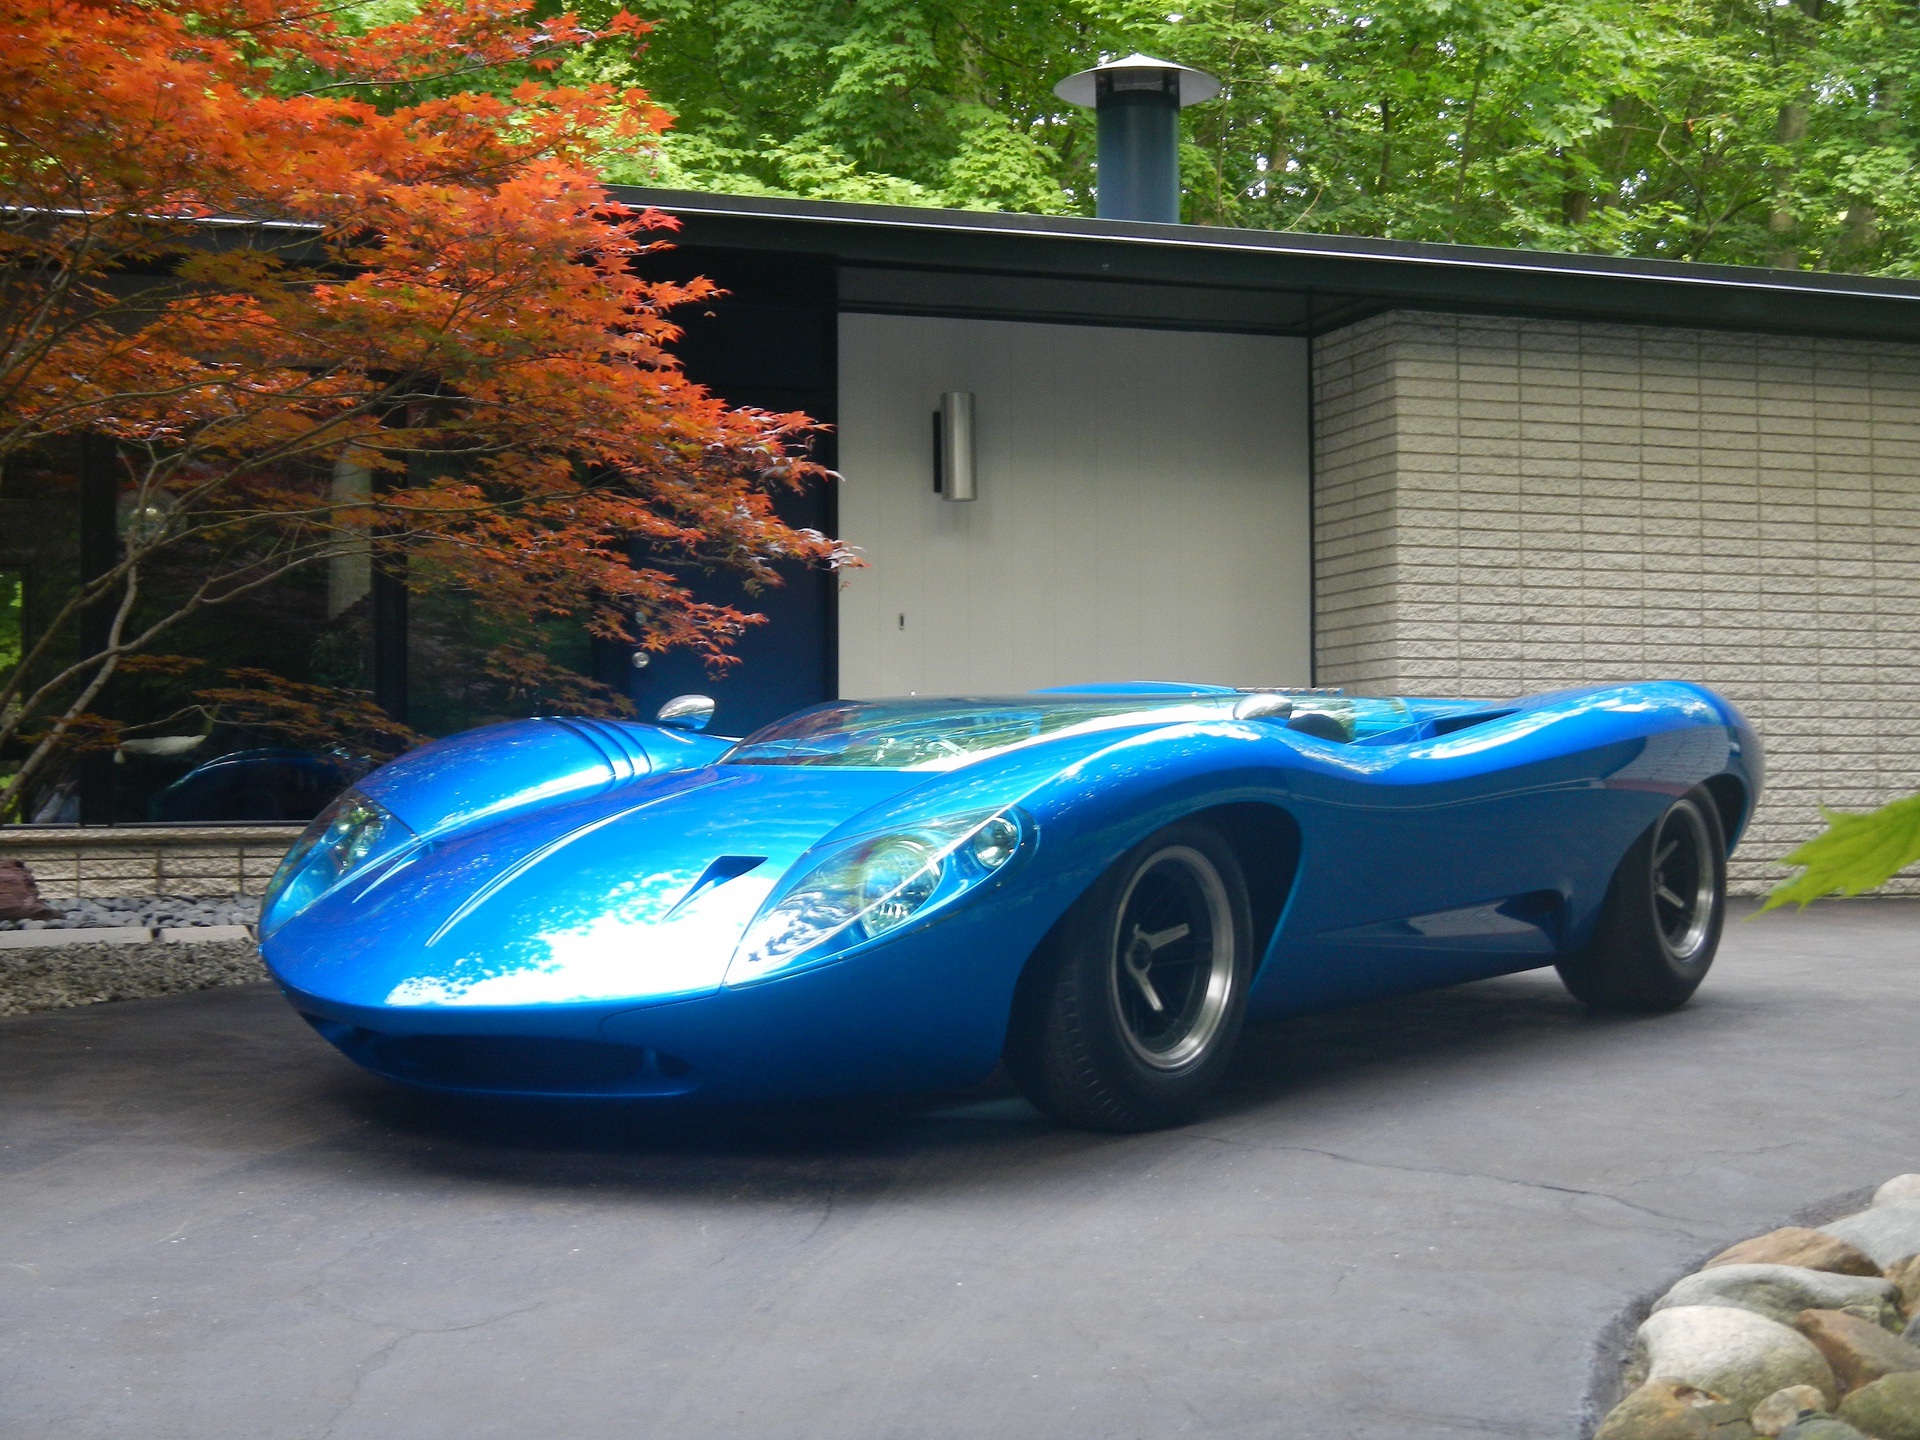
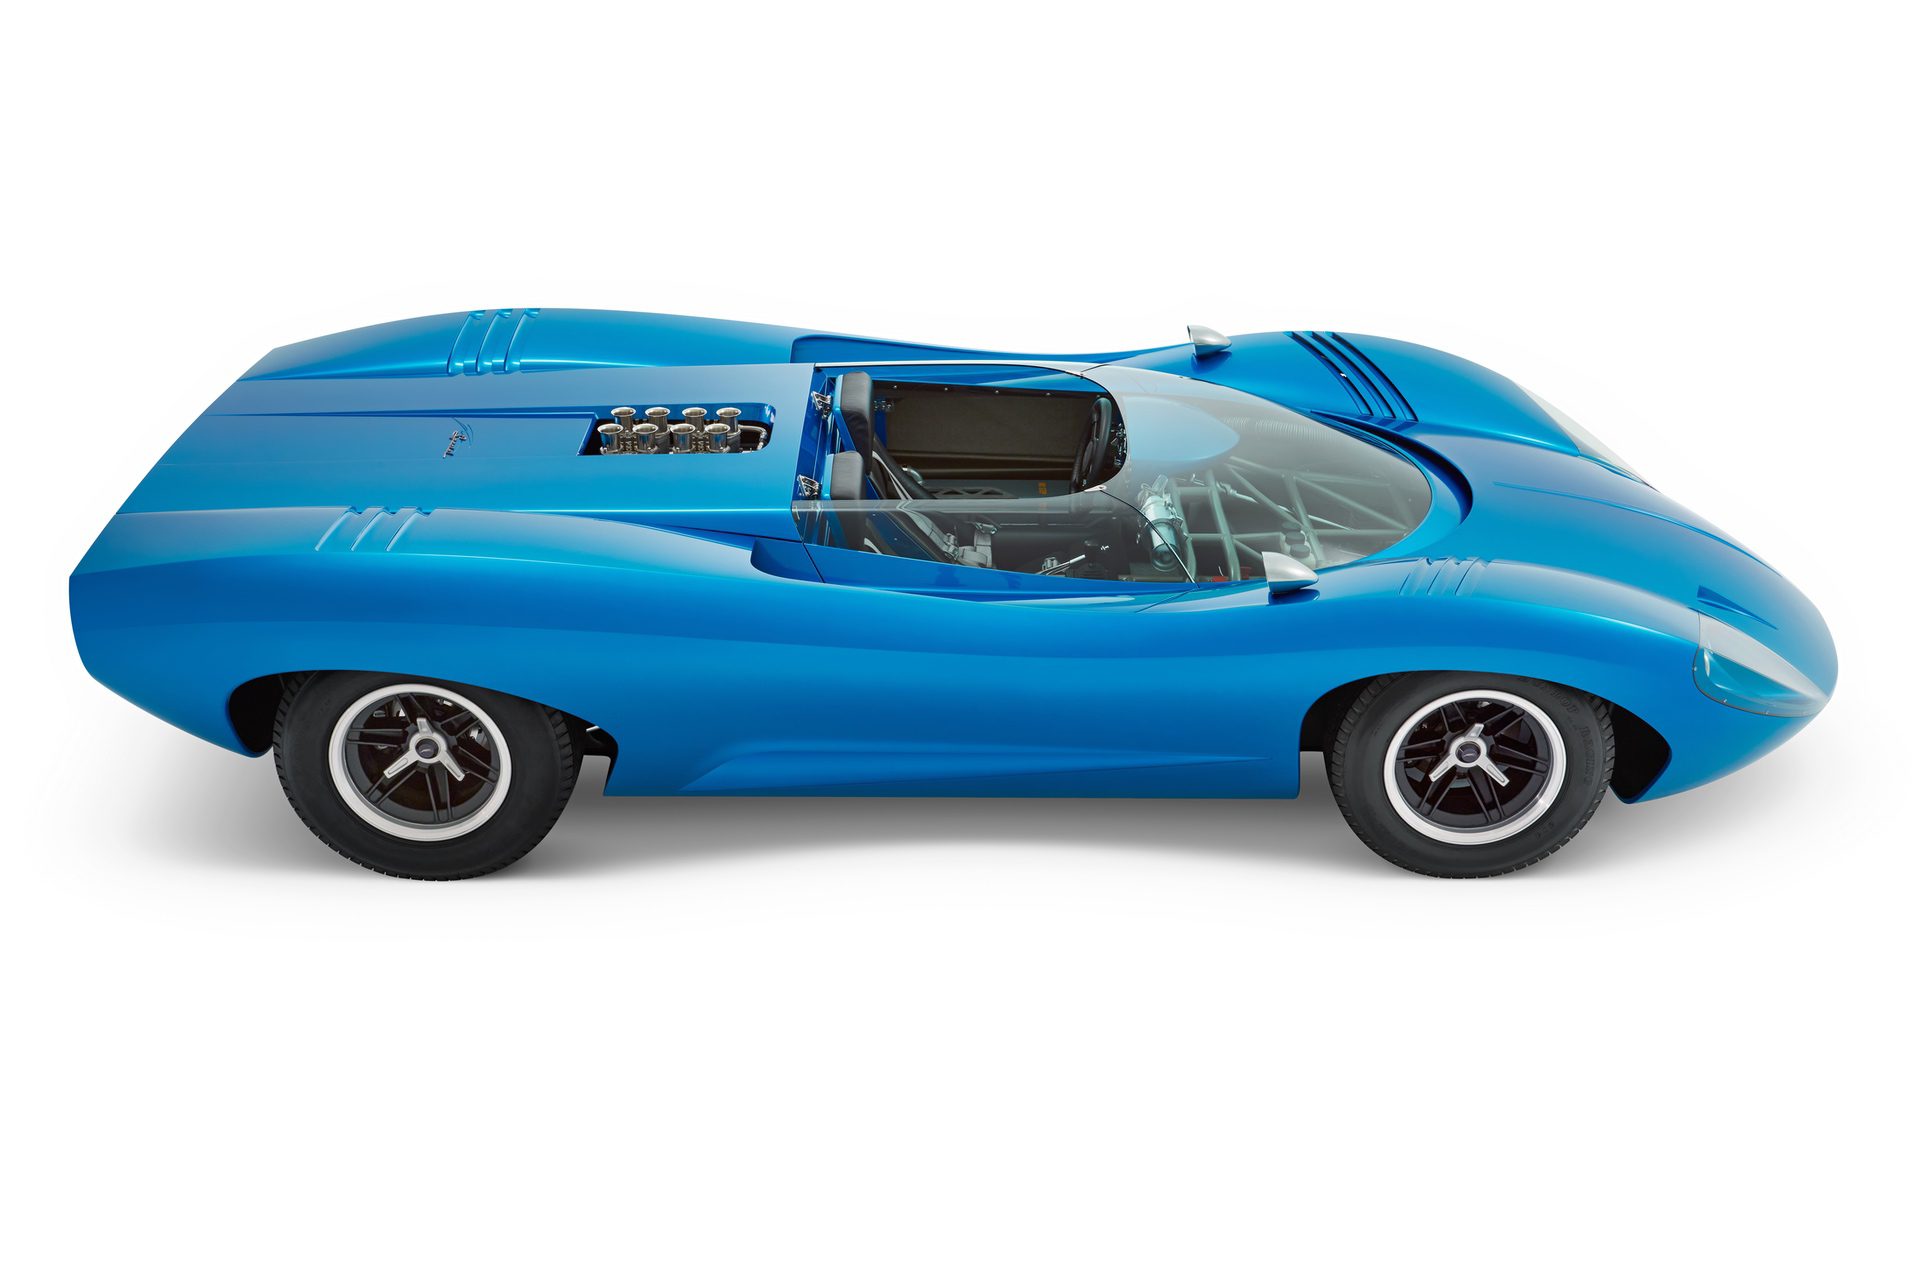
The essence of my design credo arose from the realization that I would never be able to own any of my favorite automobiles, most of which were one off creations or destroyed for various reasons. So I decided to take individual elements from my favorites and build a collage of (as well as an homage to) them.
An Unexpected Career in Sculpting & Fabricating
The first major hurdle was to sculpt the body in full scale. I originally thought to do it in plaster a la Ed Big Daddy Roth. I even considered learning to beat aluminum—but thankfully, the use of Chavant modelling clay prevailed. I got some clay and a few tools from an instructor at ArtCenter and aimlessly played around, until one day at work, a friend of mine showed me an article about the California Camaro done by John Schinella and the GM Advanced Concept Center. ACC was just a few miles from my house!
I got an interview with John and Richard Dakins, the Chief Sculptor, who promptly offered me a job. As luck would have it, they were starting work on the Stingray III show car. My plan was to stick around for a couple of years to learn how show cars are sculpted and fabricated, then move on to another career. Well, 27 years later, I retired from GM Design as a clay/digital sculptor.

Starting the JS Special Can-Am
The sculpting of the body burned up several years of weekends, holidays and occasional evenings. Initial projects included building the rail, angle, and bridge system for measuring and balancing, followed by the armature and foam buck.
The clay was recycled from the Stingray III and the Impact show car models, compliments of ACC. I began by sculpting the windshield, then made a female plaster mold, followed by a male plaster mold. From the male mold, I had a 3/16” acrylic windshield drape formed, which I then mounted back into the clay model.

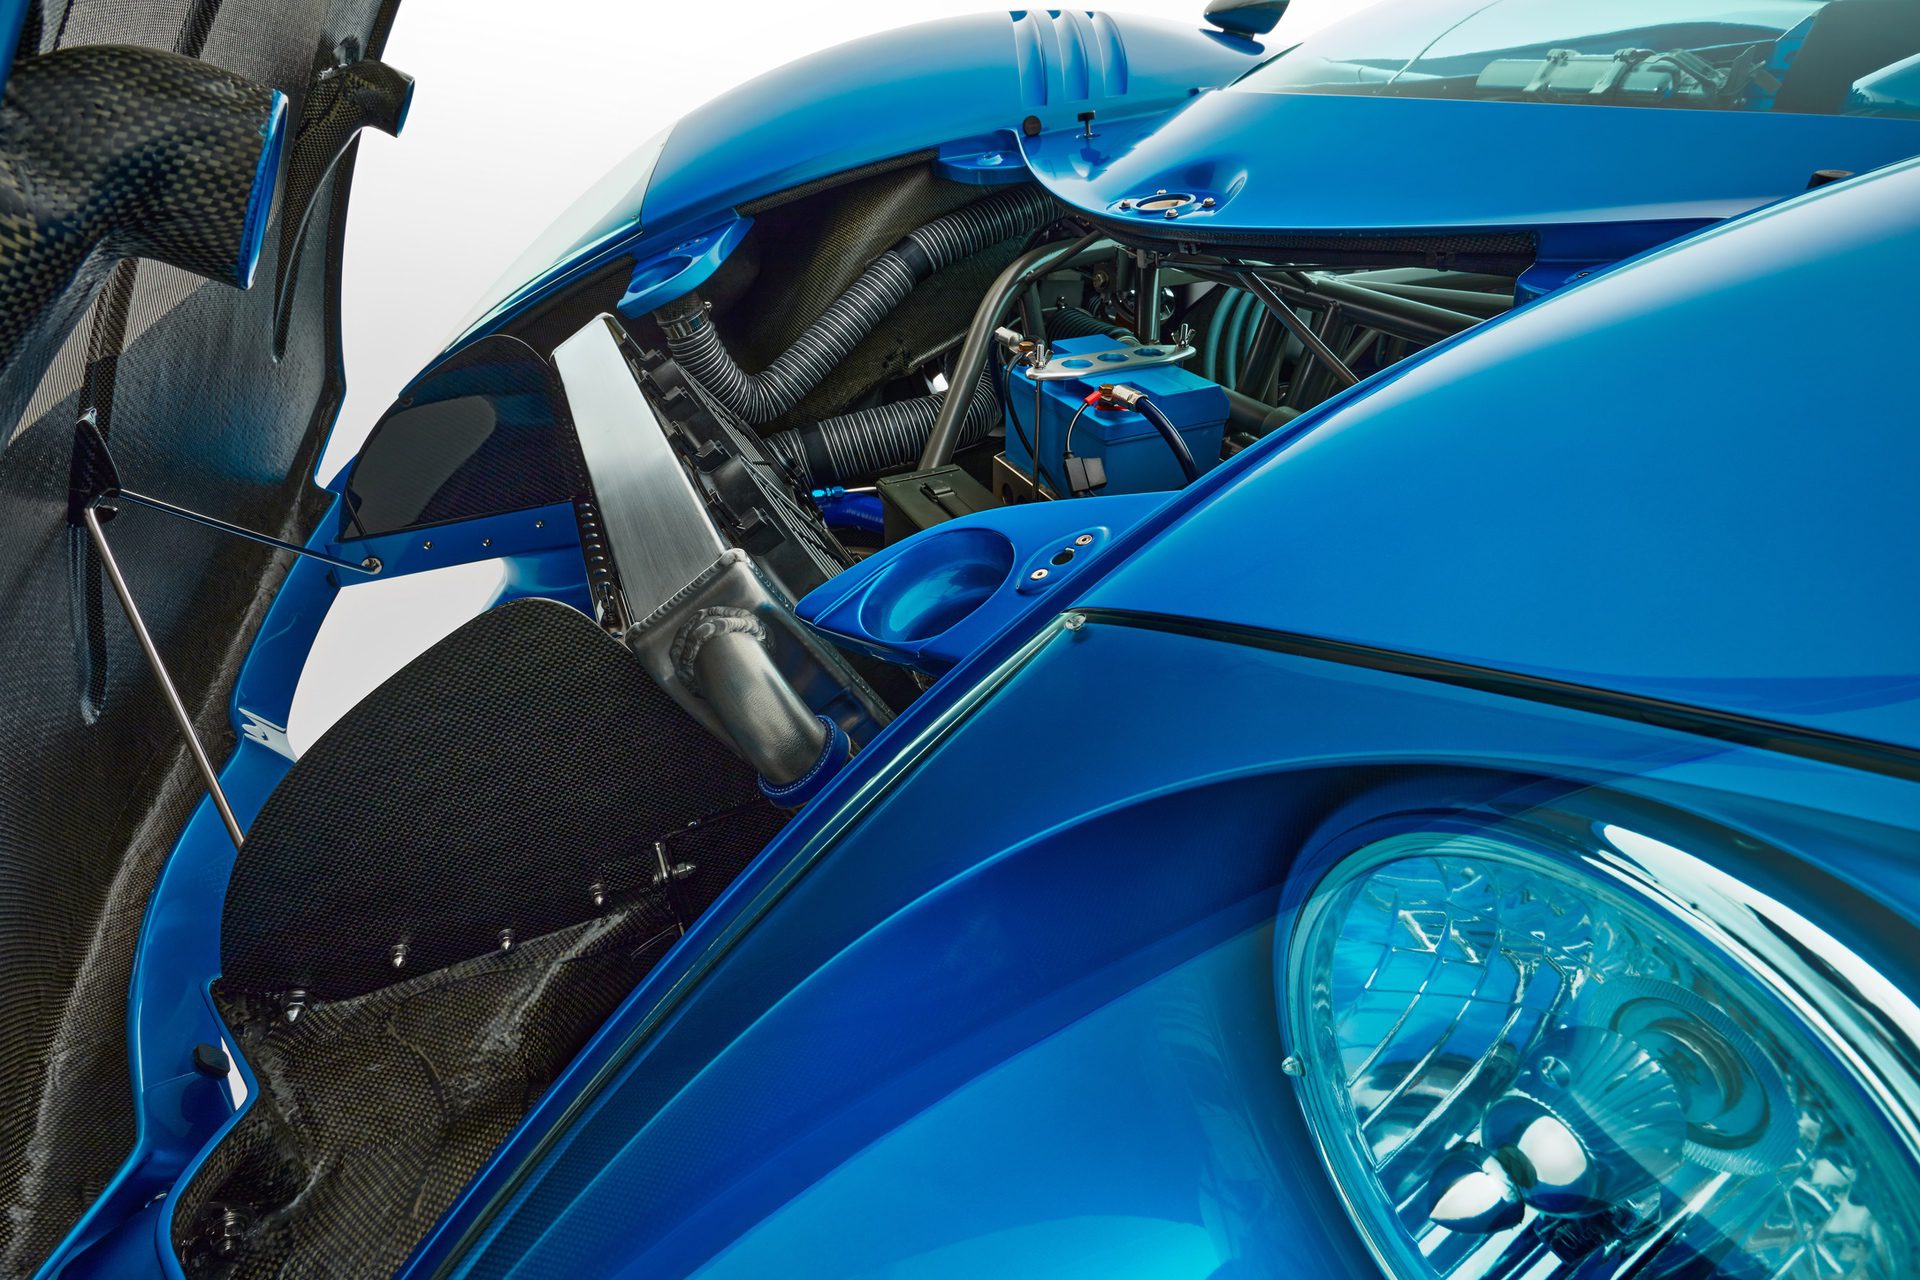
Similarly, I vacuum-formed the headlamp covers with polycarbonate over high temp epoxy male molds and reinstalled them on the clay model. Those became the anchor points to design around.
While the final car appears to be virtually identical to the concept model, I actually changed the body side several times—as well as every other surface of the design. With the help of a couple of friends, we laid up the nineteen-part mold for the main body using fiberglass, tooling foam, and epoxy. Another couple dozen patterns and molds would come later for ancillary parts such as wheel tubs, seat buckets, IP, etc.
In 1996, the brilliant minds of GM management decided to shut down ACC—so my wife and I, along with our dog and the molds, moved to Michigan in hopes of one day retiring with a stellar pension. The car project idled away for several years, until I built a detached garage in which to carry on. The next phase was the chassis design and build.

Designing & Building the JS Special Can-Am Chassis & Body
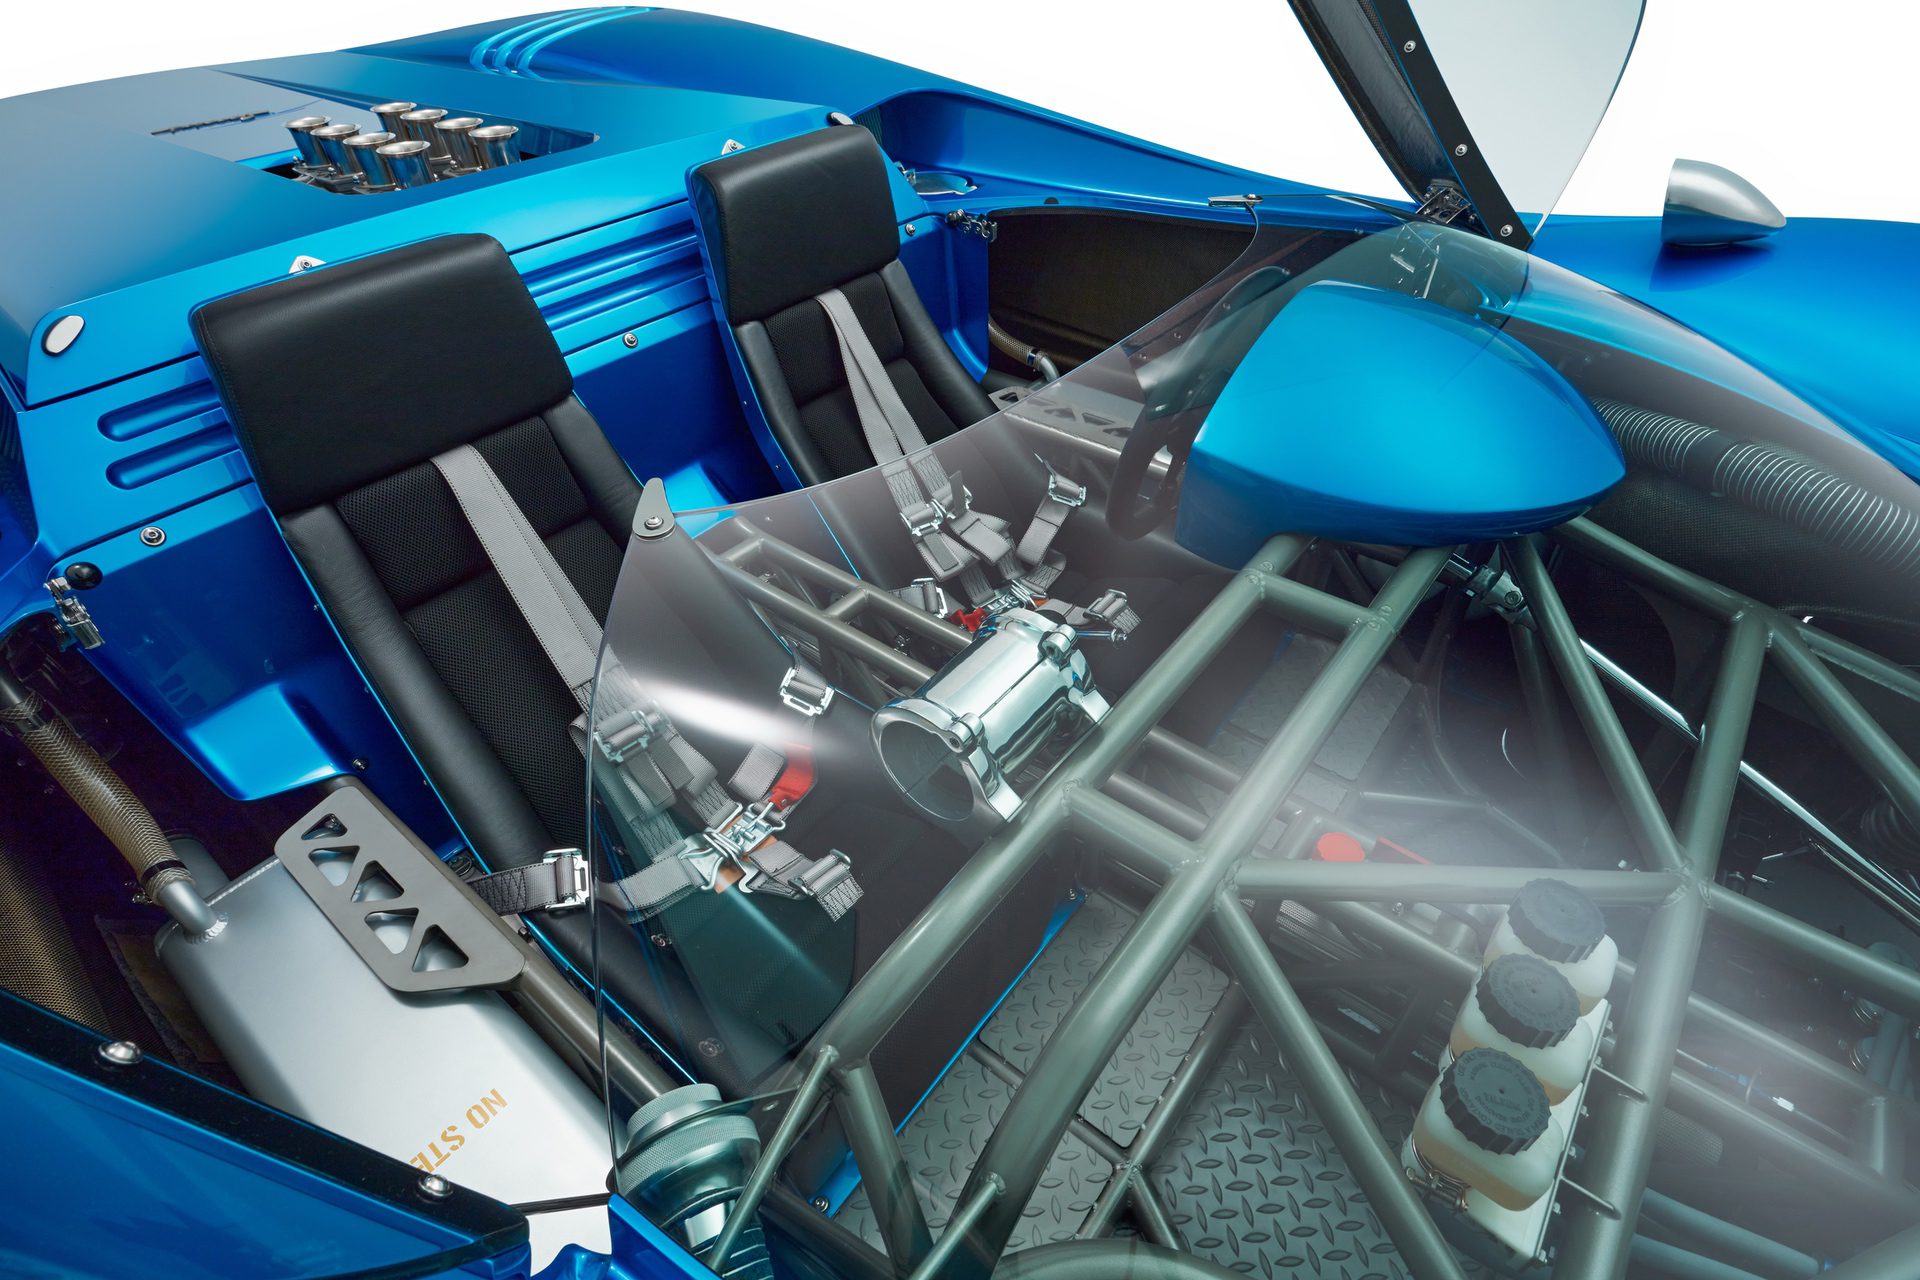
The round tube space frames (as used in the Countach LP400, Maserati Tipo 61, and others) always got me excited both from an engineering perspective and an aesthetic one. I decided to go that route.

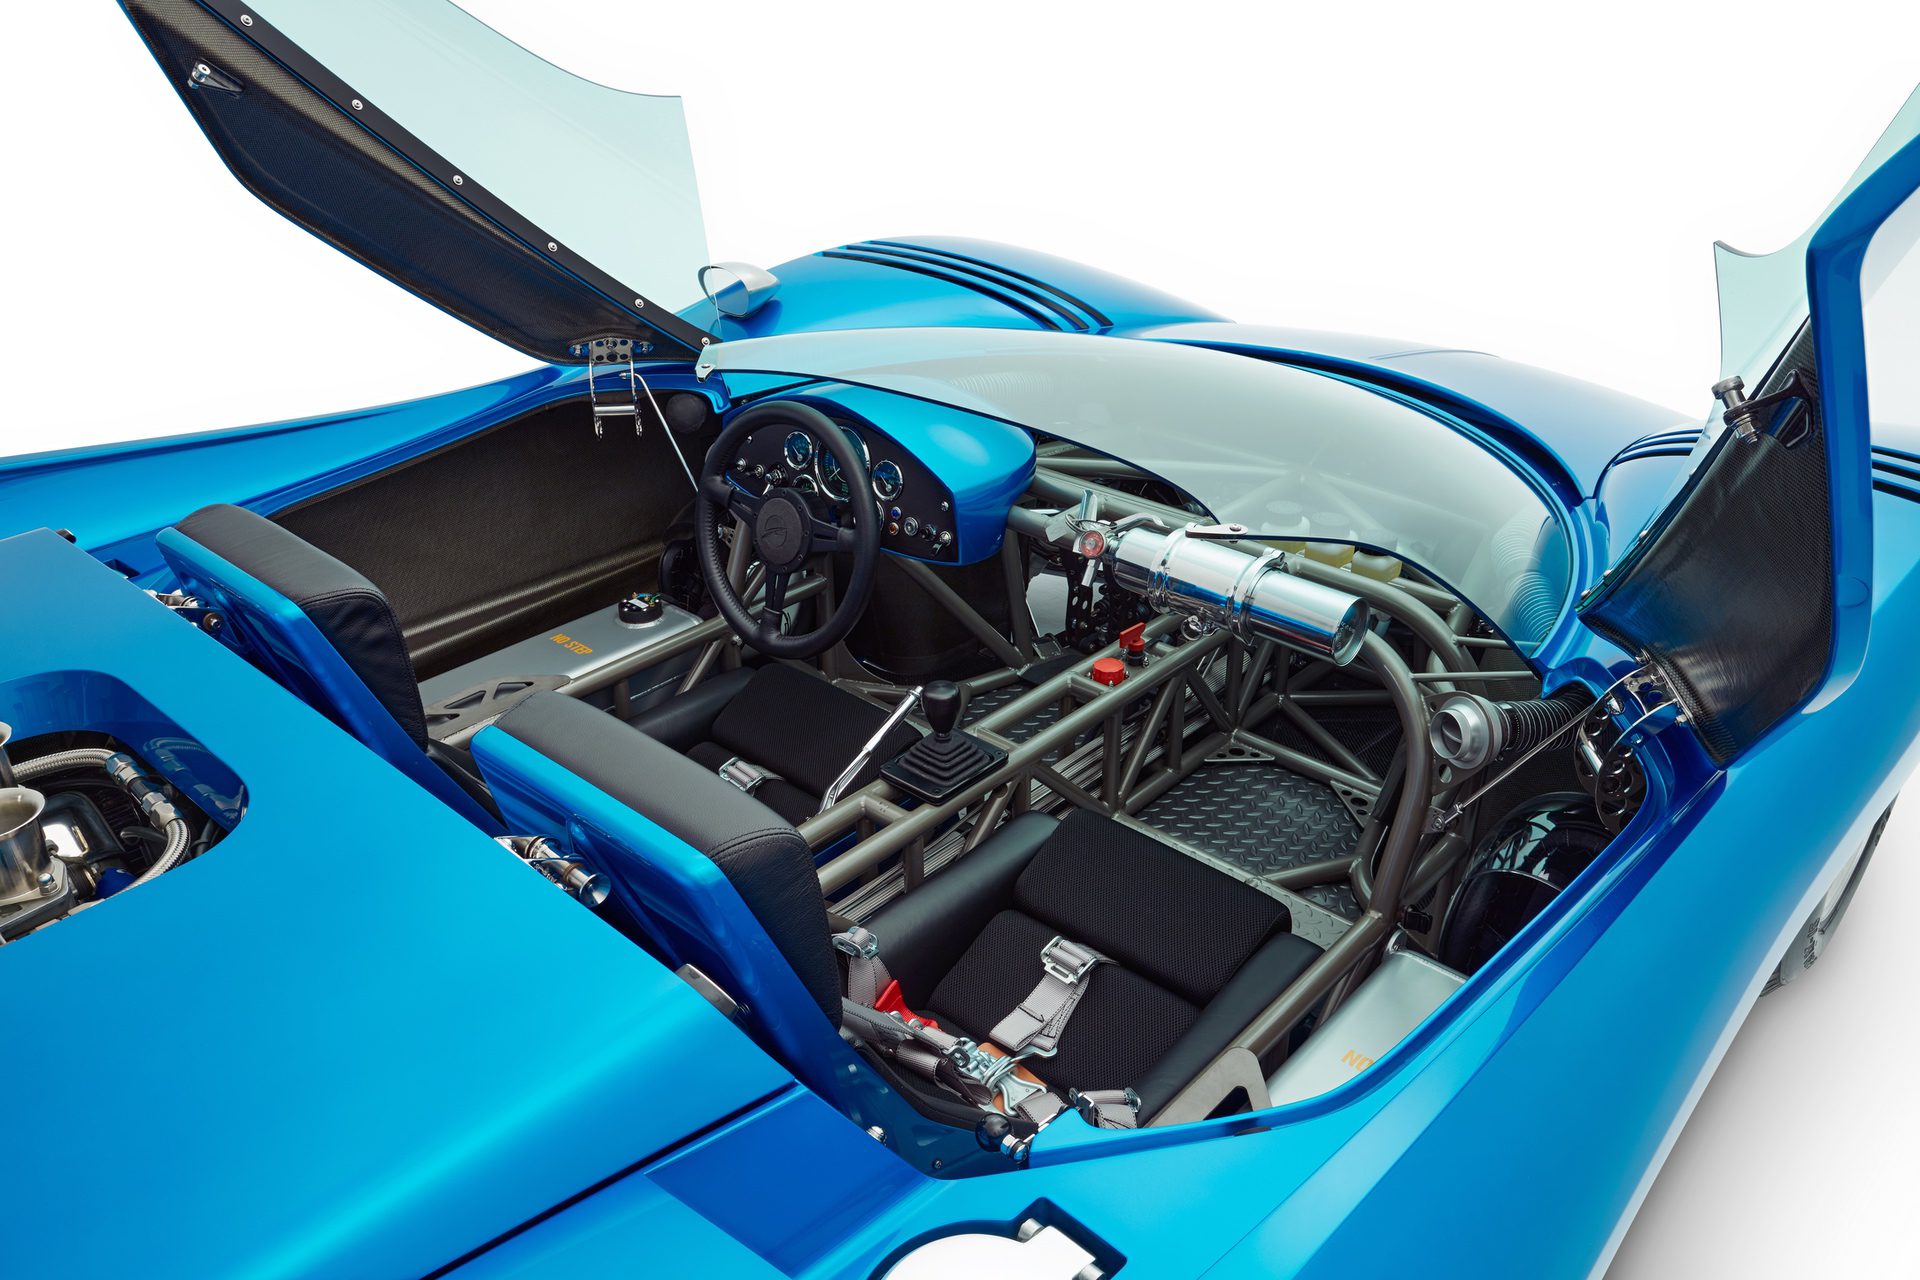
I drew up the chassis in the computer using Alias, all the while trying to triangulate each member in either tension or compression. TIG welding classes at Macomb Community College gave me the confidence to tackle the job.

The main chassis, which took only a year or so, is made predominantly of 1-1/4” .060” wall chrome molybdenum round tubing. Most of the brackets were laser cut from chrome moly.
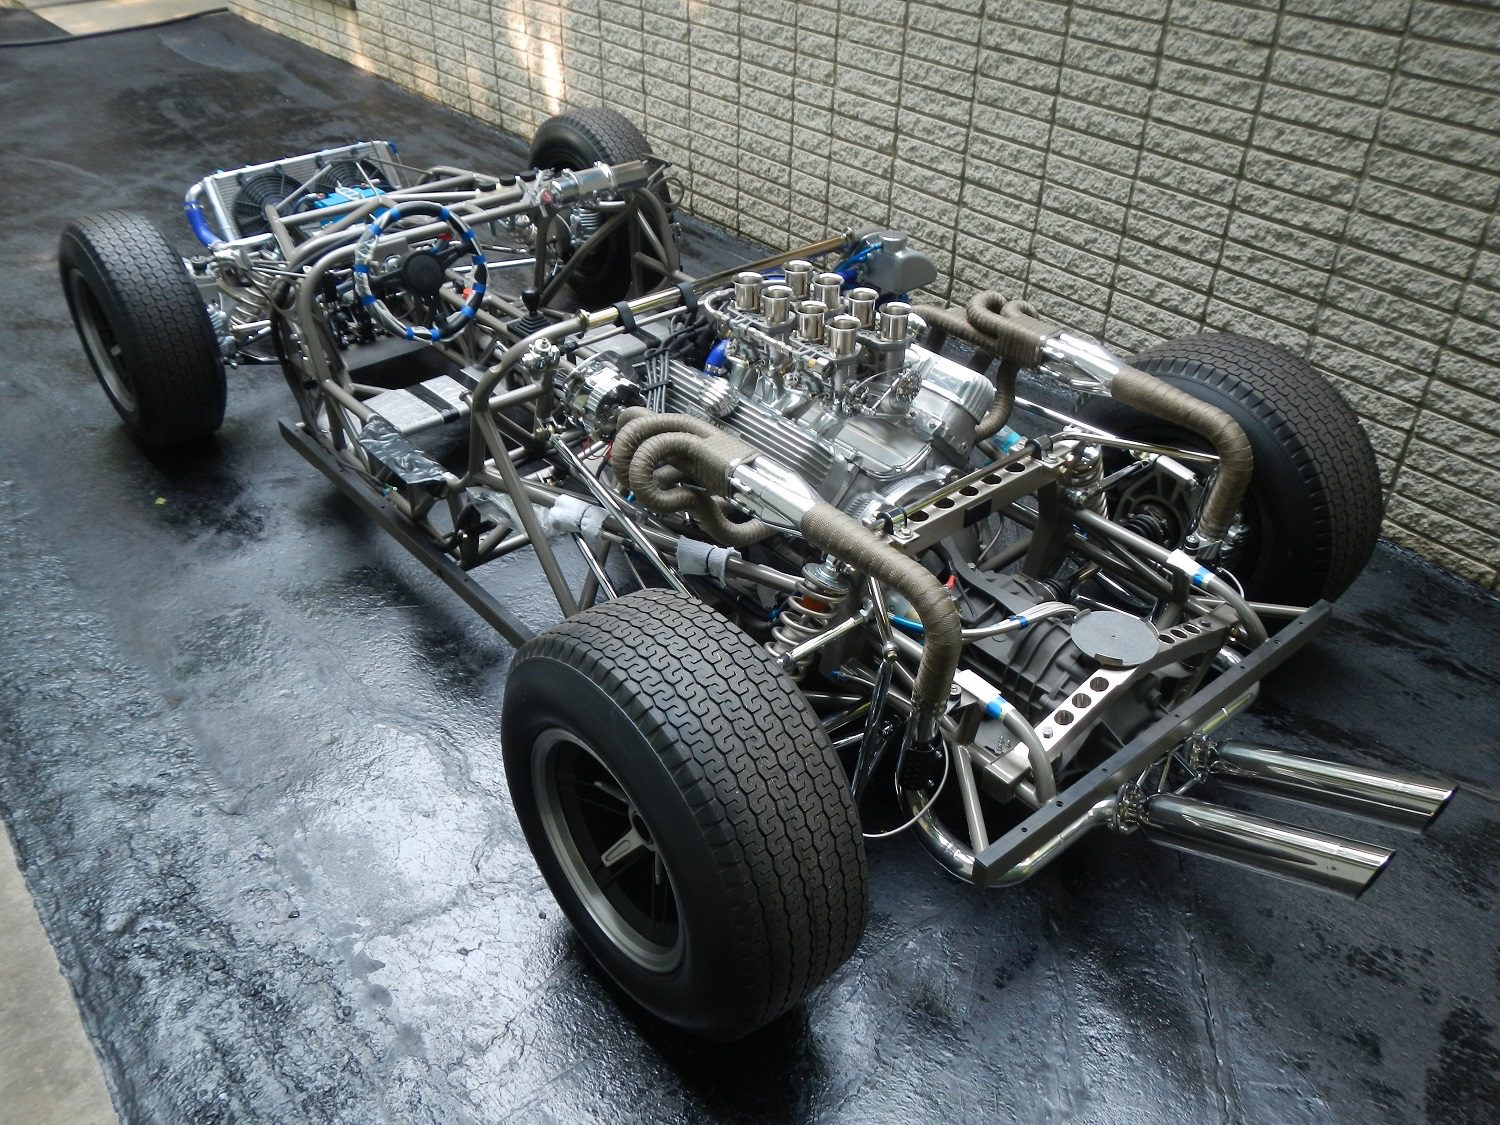
Of course, several more years of detail bracketry—as well as fitting the mechanicals and body components, etc.—followed. Once I had the chassis jigged up on the chassis table with the tires/wheels fixed and engine, transaxle, radiator, etc. mounted, I could proceed with the lay-up of the body.
For the body, I mainly used carbon fiber 2×2 twill and high temperature epoxy, which I vacuum bagged and post cured. Most panels are built up like so:
- One veil layer of 3 once E-Glass
- One layer of 5.7 once 2×2 Carbon Twill laid down at 0 degrees
- One layer of 5.7 once 2×2 Carbon Twill laid down at 45 degrees
- One layer of 5.7 once 2×2 Carbon Twill laid down at 90 degrees
- Vacuum bagged and cured
- One layer of 5.7 once 2×2 Carbon Twill laid down at 90 degrees
- A layer of either Nomex Honeycomb or Aeromat for dimensional strength
- One layer of 5.7 once 2×2 Carbon Twill laid down at 45 degrees
- One layer of 5.7 once 2×2 Carbon Twill laid down at 0 degrees
- A final layer of 4.8 once Carbon & Kevlar Plain Weave
- Vacuum bagged and cured
- Post baked in a makeshift oven
There were, of course, deviations from this schedule for the many different parts involved, but that is the gist of the operation. I built a rotisserie for the main (19-piece) body mold to make the operation comfortable. I then laid up each panel (hood, deck lid, doors etc.) individually but in situ.

For the main lower body side molds, which run from the front-to-back corners and below the belt, I hired a couple of friends so that we could lay them up in one shot and create a lap joint over the other smaller adjacent portions.
The entire body lay-up took three or four years because additional panels like the radiator extractor, fire wall, and so on had to be sculpted—molds made and laid-up, then fitted.
The car was eventually completed on the chassis table, and with the help of a couple of good friends, we ran the engine to check all systems. While the complete car was still on the chassis table, I spent a few weeks resurfacing the body with filler and high-build primer to finesse all the feature lines and perfect the sections.
The next step was to disassemble the car, all the way down to the bare singular chassis for final welding, as I had merely tack-welded most of the brackets (and some tubes) in place. For this, I built another rotisserie, which was also used for the media blasting and powder coating of the chassis. The chassis was then re-assembled for the final time.
After months of searching for a qualified painter (and interviewing several) I finally believed that I had found the right shop in Madison Heights, MI. Because that shop restores Corvettes, I imagined that they, more than anyone, would be sensitive to the surface vocabulary of my car and understand the nature of composites.
Unfortunately, the owner severely damaged my car while transporting it in his trailer from my house to his shop. It was back to sandpaper and bondo and searching for the elusive perfectionist painter.
Aggravation yielded to euphoria. Enter PPG and Motor City Solutions. My wife Kimiko, who is an automotive paint chemist, introduced me to John Zerucha of PPG in Cleveland, who worked for months with me to create the perfect paint. PPG kindly donated the paints.
The paint is a true “candy” show finish, and, as such, is horribly vulnerable to chipping. Motor City Solutions applied five base coats, eleven candy mid coats, and five final clear coats. As is usually the case with paint shops, the agreed-upon “three to four months” turned into a year, although the actual time spent on my car was only a few weeks of man hours.
Final assembly of the car took me several months. So after about four decades, the project was finally completed.

Long term projects like these require prodigious dedication and persistence. My Father warned me not to become fanatically obsessed with it, but of course I didn’t listen to him.
I would like to claim that I did this all on my own, but I would be lying. Numerous friends mentored, advised, critiqued, and assisted me along the way. There were a few roadblocks, but the final vision kept me rolling along. Best of all, I was able to continually learn new skills and tricks.
Of course, my greatest asset during this process has been my understanding and supportive wife who allowed me to spend so many hours out in the garage. She was always available to operate the engine hoist or vacuum pump, counterbalance something, help with heavy lifting, and so much more.
My heartfelt gratitude goes out to all who have given me a helping hand over the years and enabled me bring this dream to fruition.
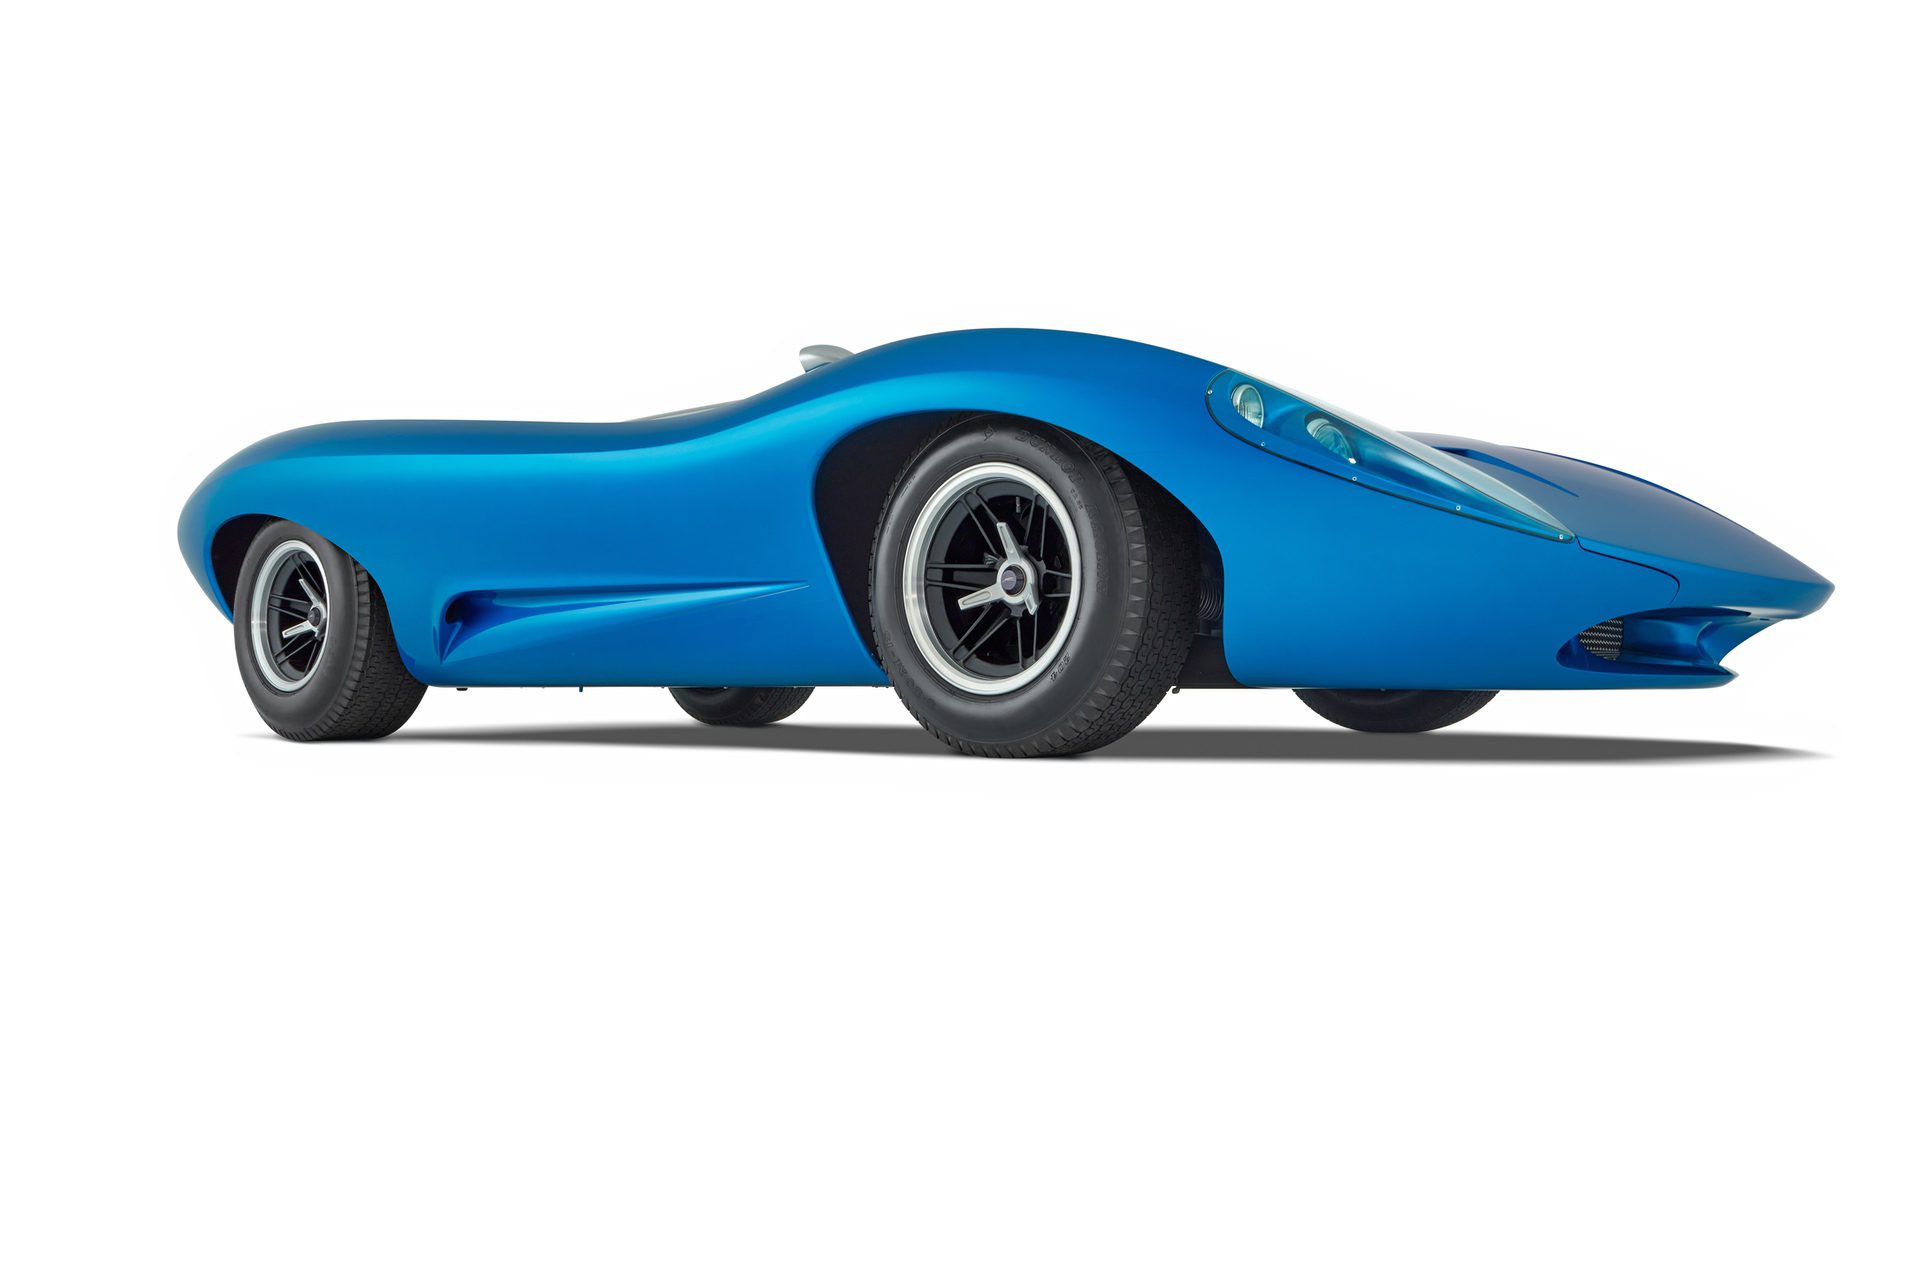
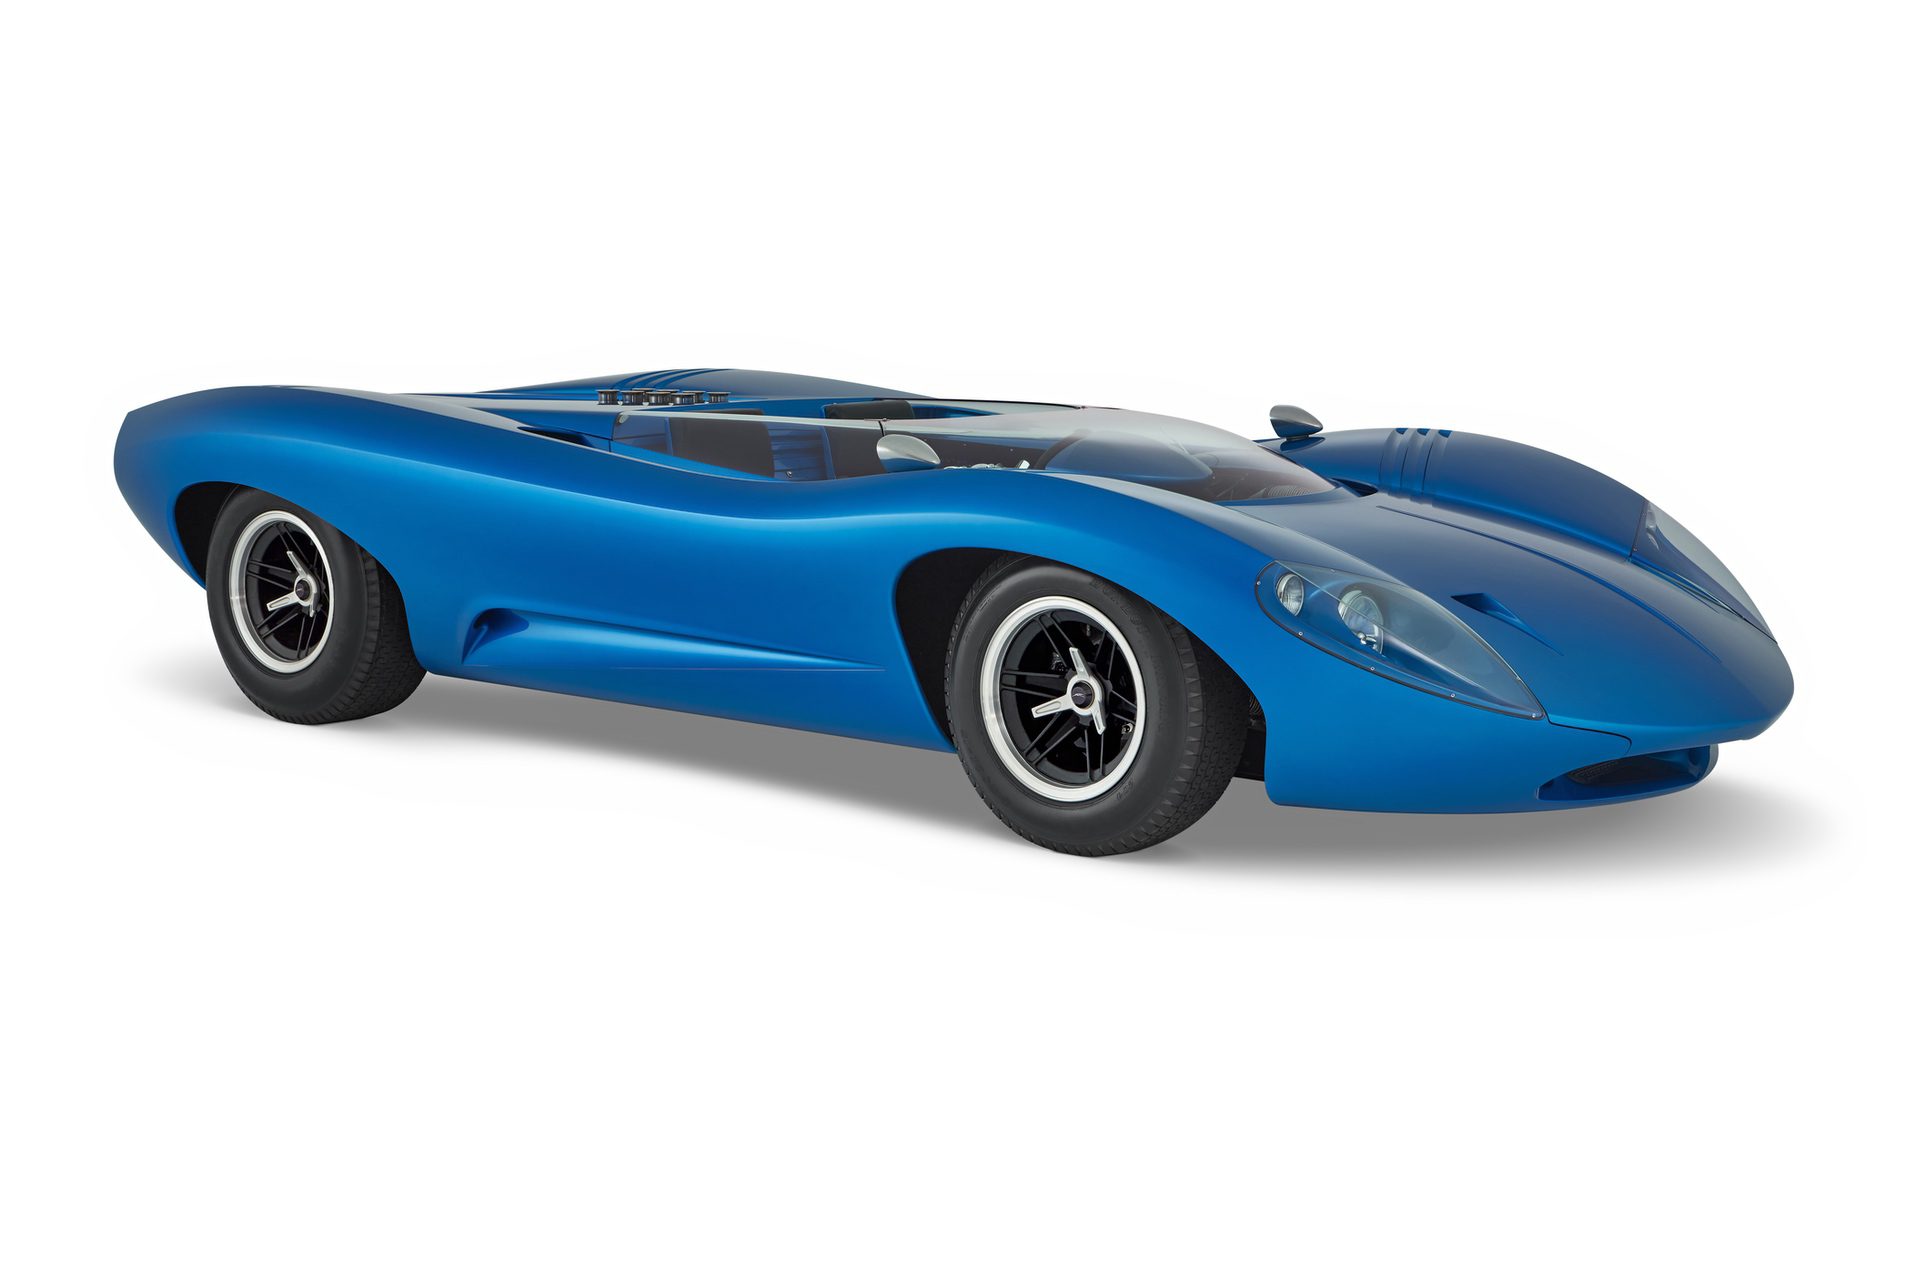
Studio photos were provided by Tom Kirby of Blue Sky Photography.
Photo Gallery

Jerry…Congrats on finishing a true labor of love. The design reflects so much from the era for which it was intended….that time passed quickly leaving an obsolete yet gorgeous form. I had exactly the same experience in designing the Nethercutt Mirage. It took years longer than expected to finish and was outdated by the time it finally got on track. Really interesting to compare these two forms as the thinking behind both was almost identical. I hope you can display the JS Special at some the country’s leading Concours events…It needs more exposure. Peter Brock
That is one of the most beautiful cars I have seen. So well proportioned and flowing.
Wow , the dream of a lifetime finally came to fruition ! Congratulations , it turned out as a beautiful dream come true .
A thing of beauty is a joy forever. Congratulations to you and your wife for being able to execute your vision. Such an evocative design. Good job sir.
Fantastic story, incredible persistence, and a wonderfully unique retro modern interpretation of the classic CanAm shape. As someone who has toiled with my own project (of a similar sort) for the past 15 years I’m completely in Awe! This is inspirational.
Bravo!
I’ve known Jerry since the day he hired in at GM’s California advanced studio. We collaborated on several designs on which he demonstrated his superb sculpting skills. I followed the development of this car from its clay stage onward and admired his dedication to executing every part of it without compromise. It was a thrill to see it in person shortly before he moved back to California. It was a jaw-dropping experience and the few of us who saw it immediately said that the rest of the automotive world should see it. I sincerely hope that Jerry has a chance to share it at one or more live venues.
I had the pleasure of knowing Jerry at GM. Our shared interest in design collecting led to many conversations, few of which happened to bring up what he’d been creating in his garage at his stunning mid-century house. When I finally saw the car, by this time complete, I was gobsmacked. It is an incredible achievement. And Jerry is about the most humble, inquisitive, knowledgeable, talented guy you could hope to meet. Congratulations again Jerry! Well done!